Making a Rose Flower with Fondant: Pull the fondant with your hands to warm it. Then make a small ball the size of a
 marble. Form it into a cone. That will be the center of your flower. Then make a ball half the size of your first ball. Place the ball between saran wrap and press into a circle with your fingers. This will be your first petal. Attach it at the bottom of your cone and wrap it around, leaving it open at the top. Do a second petal and wrap it around the cone's other side. You are now done with your first row of petals! For your second row, use three petals. For your third row, use four or five. Bend the petals slightly outward and away from the tip of the cone. Cut the bottom of the flower at an angle so it will lay pretty on the top of your cake. Make leaves or more flowers as you like.
Leveling a Round Cake and Preparing it for Fondant: Remove the cake from its cake pan; we used a pound cake. Use a long, non-serrated or very mildly serrated knife to cut off the unlevel, dome portion of the cake. Start cutting at the lowest part and go across. If you don’t get it completely level, don’t worry. Now flip the cake over. You always want the seared side up.
Take a buttercream icing and a long icing spatula and apply the icing to the sides of the cake, then the top. Do not worry about making it look good. Now take flat wide tool (such as a chop) and scoop most of the icing off the sides, and then the top. You just want a level surface for your fondant, even if it’s a thin layer and the cake shows through. Don’t use too much icing or your fondant will bubble.
Applying the Fondant: Use two long wide spatulas to move the cake to your cake serving plate. Stick both spatulas with downward pressure under your cake, move to the cake plate, and push down as you quickly move the spatulas out from underneath the cake one at a time. If you remove the spatulas slowly your cake will crumble.
Now it’s time for fondant! Use confectioner’s sugar to dust your rolling surface. Pull the fondant with your hands to warm it and then roll it into a large ball. Place it on your rolling surface and roll it out. If you want to pick it up and turn it 90 degrees, add a little more powdered sugar underneath. When it’s big enough to cover your whole cake, drape it once over your rolling pin and carry it to your cake.
Now it’s time to put the fondant on your cake! Start unrolling the fondant over the cake at the side closest to you and drape it over the rest. Set the rolling pin aside. Tap the fondant down around your cake. The fondant is like rubber, so pull and stretch it to get it to do what you want; don’t fold it. Tap it down around the base of your cake. If you get a fold, pull and stretch the fondant away from the cake, then tap it down. Cut the excess fondant away from the cake with the pointy tip of a knife.
Piping the Trim: Use a Ziploc bag with a princess piping tip and your buttercream icing. Pipe the icing in small dots/dollops around the base of your cake. Pipe a tiny bit of icing on top of your cake to secure your fondant flower to your cake. You could also use Vodka to secure two pieces of fondant to each other.
Note: If you are trying to cover a square cake the process is different. For a square cake, cut out one square of fondant for the top and four rectangles for the sides. Apply them to your cake and seal the edges with piped icing.


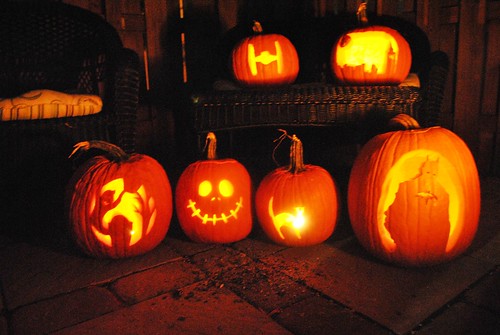
 Procedure: We carved pumpkins. First we carved around the stems with a large knife, entered our pumpkins, then removed their seeds and gooey insides with a pumpkin-carving spoon. I lightly drew my design on my pumpkin with a brown marker, then cut it out with thin pumpkin-carving knives. Stacy printed her design out on her printer, traced her design by pricking through the paper, then cut out where she'd pinned with a pumpkin-carving knife.